How to composite a VRChat avatar into real-world footage for free, and make a walking video
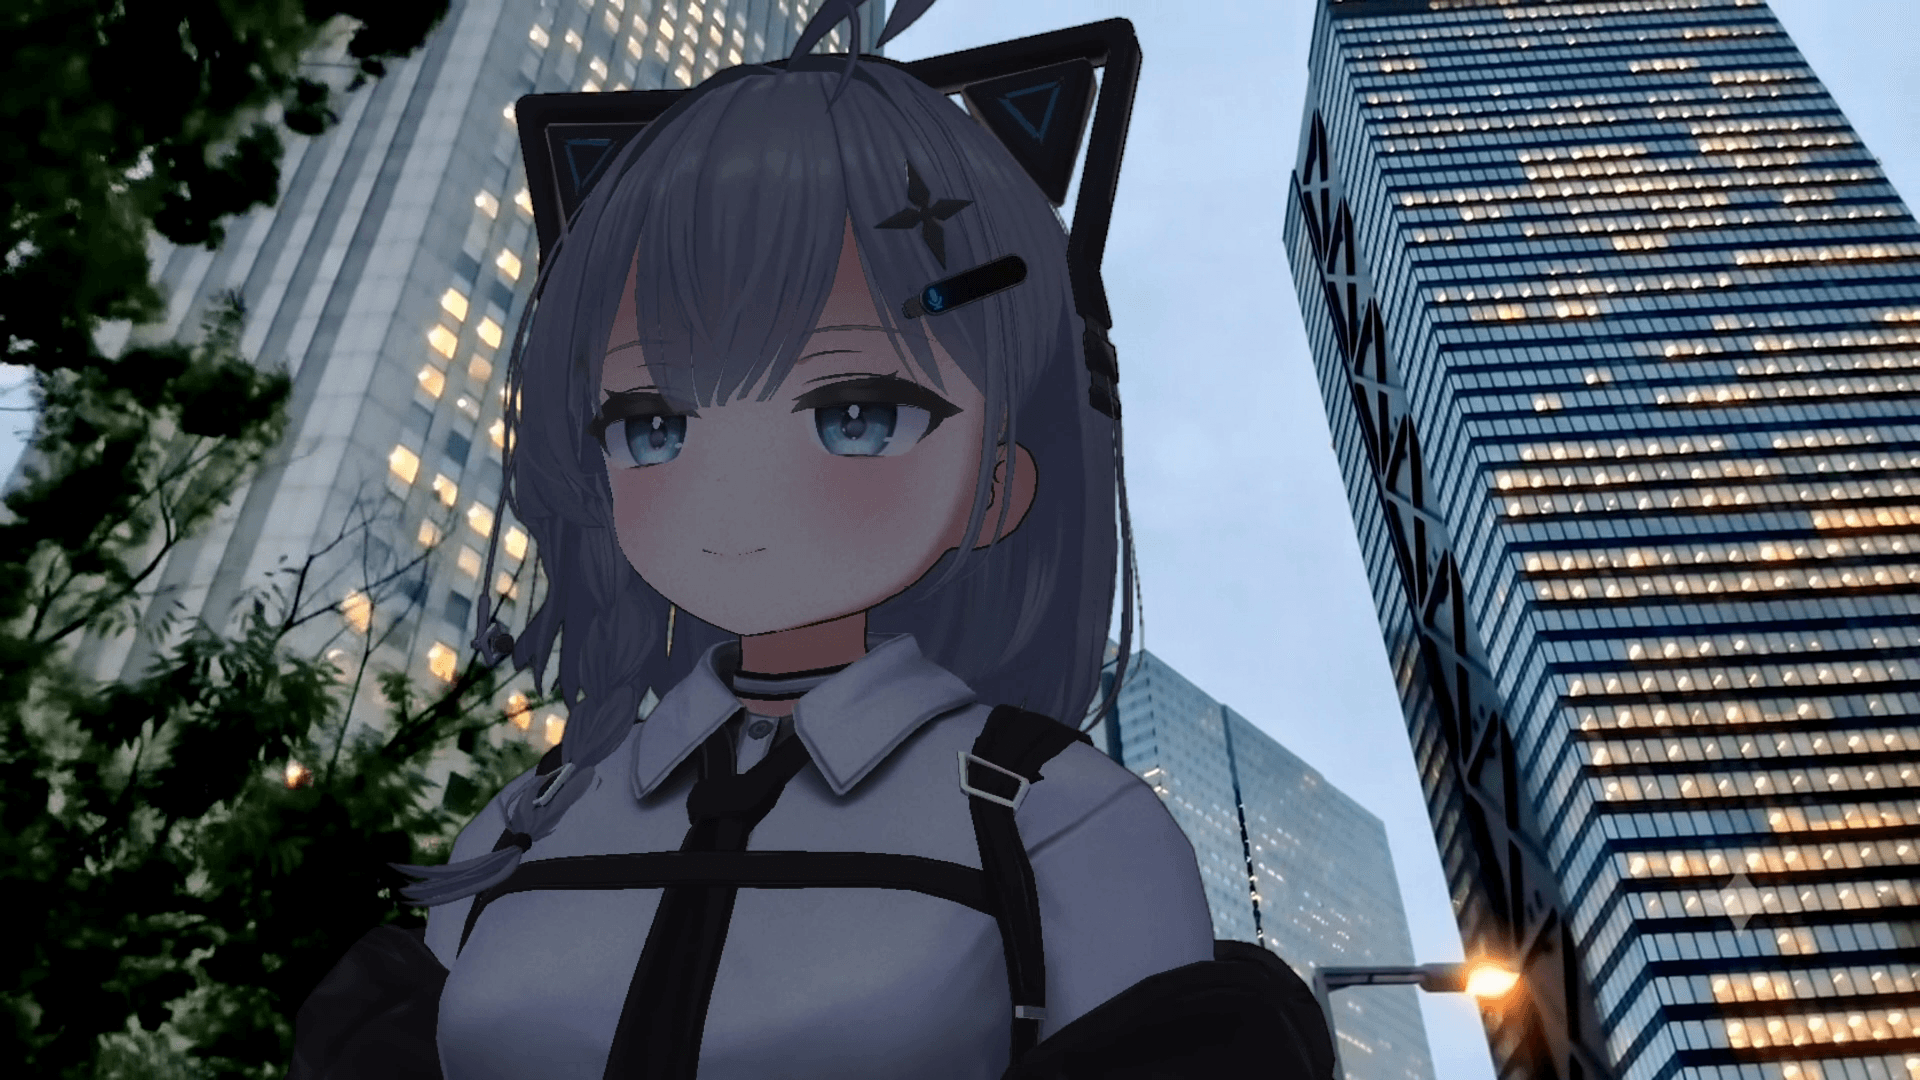
Table of Contents
I’ll explain how to composite a VRChat avatar into a selfie video shot while walking, like in this post!
自撮りの動画をVRChatアバターに置き換えるやつできた! pic.twitter.com/OPCzBiKCyB
— ろぼいん (@keita_roboin) June 13, 2026
The method I cover in this article works in standard video editing software and does not require paid tools. It has these advantages:
- You can make it with free video editing software
- You do not need full-body tracking, though it can make the result feel a little more natural
- You can make one in under an hour once you have video editing software installed and understand its basic controls
That makes it easy to try. Give it a shot!
*I use the word “tracking” throughout this article. In most cases, I mean the point tracking feature in video editing software, rather than full-body tracking or face tracking.
How to make it
The overall workflow looks like this:
Shoot a live-action selfie video while walking
Record a video of your avatar looking around
Track the body movement in the live-action video, then apply that movement to the avatar video and composite the two
Adjust the details until it looks right
In my case, excluding the time spent shooting the live-action footage, the whole process took less than an hour, including capturing the avatar footage and experimenting. I made it without looking anything up, though someone may have done something similar already.
Here is a rough making-of video.
From here, I’ll walk through the detailed steps.
Shoot the live-action video
First, shoot a selfie video while walking. Strong camera shake can cause the tracking to slip in later steps, so I recommend using a gimbal.
I shot the video with a Google Pixel 8 mounted on a DJI Osmo Mobile 6. DJI seems to have released the Osmo Mobile 8 recently.
When shooting, avoid showing too much of your body, but make sure at least your face stays visible. If your body takes up too much of the frame, you will have more to hide. If your body disappears from the frame, the software cannot track it.
I also recommend shooting the video from a low, upward angle. This limits how much scenery you capture, but it reduces the chance of other people entering the frame and makes mismatched focal lengths between the live-action footage and avatar footage less noticeable.
Record the avatar video
After shooting the live-action footage, record a VRChat video of your avatar looking around, like this. You do not need to match the live-action camera angle exactly. However, if you shot the live-action video from a low, upward angle, shoot the avatar video from a similar low angle.

Avoid worlds with colored lights or post-processing, as they produce footage that is harder to work with. Shoot in a world with white lighting and no post-processing.
I had favorited a world called “Auto Splatter,” which can turn any photo into a 3D display, so I shot there. I did not use the photo-to-3D feature, so you do not have to use this specific world.
When recording, turn off the world in the camera mask settings so that only the avatar appears.
I’ll leave the detailed setup to other articles, but you can get transparent-background footage by sending the Stream Camera output through Spout and capturing it in OBS Studio. I had a deadline coming up and did not have time to set that up, so I recorded against a green screen. With the right settings, you should be able to record with transparency intact.
Also, do not walk or step in place while recording. Stand still.
I used full-body tracking for my recording, but you do not need it because the avatar does not have to walk. Full-body tracking might make the torso movement look a little more natural when you turn your head.
Track the body movement in the live-action footage
Use video editing software to track the up, down, left, and right movement of your body relative to the frame in the live-action video.
I used the paid DaVinci Resolve Studio, but this method only uses 2D tracking, so the free version of DaVinci Resolve should work as well. You can also use any other video editing software that supports 2D tracking.
In DaVinci Resolve, you can track the footage with these steps:
Place the live-action video on the timeline
Right-click the live-action video track and open Fusion from [Open in Fusion Page]
![DaVinci Resolveのコンテキストメニューに[Fusionページで開く]と表示されているスクリーンショット](/_next/image/?url=%2Fapi%2Fmedia%2Ffile%2Fdavinci-resolve-open-with-fusion.png&w=1080&q=75)
Select the live-action video node, press Ctrl + Space, type “tracker,” and add a tracker
![DaVinci Resolveのノード追加画面に[トラッカー(Tra)]と表示されているスクリーンショット](/_next/image/?url=%2Fapi%2Fmedia%2Ffile%2Fdavinci-resolve-add-tracker.png&w=750&q=75)
Select the tracker node you added, which uses the default name “Tracker1”
Move the tracker box in the preview to the position you want to track
In the Inspector, click [Track Fwd Then Reverse] to run tracking. This takes a little time.
![DaVinci Resolveのインスペクターでトラッカーノードを表示したときのスクリーンショット。[Tracking]セクションに[Track Fwd Then Reverse]というツールチップが表示されている](/_next/image/?url=%2Fapi%2Fmedia%2Ffile%2Fdavinci-resolve-track-forward-reverse.png&w=1920&q=75)
If tracking does not stay stable or stops partway through, try changing [Adaptive Mode] to [Best Match]
![DaVinci Resolveのインスペクターでトラッカーノードを表示したときのスクリーンショット。[適応モード]セクションで[ベストマッチ]が選択されている](/_next/image/?url=%2Fapi%2Fmedia%2Ffile%2Fdavinci-resolve-tracker-adaptive-mode.png&w=1920&q=75)
You now have the up, down, left, and right movement of the real avatar tracked. In the next step, you will apply the tracking result to the VRChat avatar video.
Apply the tracking result to the avatar video
Use the following steps to apply the live-action tracking result to the avatar video.
If the live-action video and tracker node connect to [MediaOut1], disconnect them
Drag and drop the avatar video from the media pool into the node editor to load it
Select the avatar video node, press Ctrl + Space, type “xf,” and add [Transform (Xf)]
![DaVinci Resolveのノード追加画面に[変形(Xf)]と表示されているスクリーンショット](/_next/image/?url=%2Fapi%2Fmedia%2Ffile%2Fdavinci-resolve-xf-node.png&w=750&q=75)
Select the transform node you added, which uses the default name “Transform1”
In the Inspector, right-click [Center] in the [Transform] section, then choose [Connect] > [Tracker1IntelliTrack1Path1] > [Position]
![DaVinci Resolveのインスペクターでトランスフォームノードを表示したときのスクリーンショット。[変形]セクションに[センター]の接続先を設定するコンテキストメニューが表示されている](/_next/image/?url=%2Fapi%2Fmedia%2Ffile%2Fdavinci-resolve-transform-connect-to-tracker.png&w=1920&q=75)
The avatar video should now move up, down, left, and right in sync with the real avatar.
Composite the two videos, and you’re done!
Now composite the two videos and fine-tune the details.
Return to the Edit page in DaVinci Resolve, then place another live-action video track below the track you just edited
Scale the avatar video and adjust its initial position so that the VRChat avatar covers the real avatar in the live-action footage
Adjust the color of the avatar video on the Color page as needed
If you shot the live-action video on a smartphone, you can help the avatar blend in by adding a little Gaussian blur and noise to the avatar video, then applying sharpening to recreate the look of smartphone camera processing
Done!!!
Once you finish, try sharing this article or quote-posting the original post with your work. And I’d be happy if you followed me on X too...!
自撮りの動画をVRChatアバターに置き換えるやつできた! pic.twitter.com/OPCzBiKCyB
— ろぼいん (@keita_roboin) June 13, 2026
Key points in this method
As a bonus, I’ll cover a few of the ideas behind this method. These choices reduce production effort while making the shortcuts harder for viewers to notice.
First, I track the real avatar’s movement as a 2D point, not as 3D motion. In selfie videos shot with a selfie stick or gimbal, the subject’s depth position stays fixed, so you only need to track movement up, down, left, and right.
For the avatar video, I do not recreate the real avatar’s live-action motion at all. The avatar does not walk and only looks around. Because of the reason above, syncing only the up, down, left, and right movement with the live-action video makes the avatar look like it is walking. Since you can record the avatar video without walking, you do not need a large shooting space or full-body tracking.
When compositing live-action footage with CG, you would normally need to match the angle and focal length of the live-action camera with the camera inside the CG scene. Shooting the selfie video from a low, upward angle makes nearby scenery other than the person less likely to appear, so viewers have a harder time noticing mismatched angles or focal lengths.
Verification details
Verification environment
- OS: Windows 11
- Video editing software: DaVinci Resolve Studio version 21.0 BUILD 48
- Camera: Google Pixel 8 (Android 17 + Pixel default camera app)
- Gimbal: DJI Osmo Mobile 6
- VRChat: version 1856
Verification details
I confirmed that the steps in this article can composite a live-action selfie video with a VRChat avatar.
Last verification date
Share this article
Follow us for updates
Adding us to your preferred sources on Google makes it easier to find our articles on Google. Also, be sure to follow us on X and our RSS feed.


Related articles
- How to fix "The driver C:¥Windows¥system32¥drivers¥logi_joy_bus_enum.sys" error when a game will not start
- Why did YouTube's Clip disappear? Explaining why it was removed and alternative methods
- VRChat fan world Tsukuyomi Tutorial Space, recreating Tsukuyomi’s tutorial from Cosmic Princess Kaguya!, is now available
- Why some websites show “polyfill.io requires a username and password,” and what to do: do not enter any information
- Bug with X search source: command not working correctly and how to work around it
-1.png&w=1080&q=75)
I've been using JavaScript more than my native language since birth. I am nowhere and everywhere on the internet.
I build web apps and browser extensions in TypeScript as a web frontend programmer. I released Shadowban Scanner, a tool that detects shadowbans on X, and Restore Link Card, a tool that brings back link cards. Media outlets in Japan and abroad covered both tools. For iGEM 2023, I built the Wiki for Team Japan-United and helped the team win the Grand Prize. On my blog, I cover news about X and social media, test and troubleshoot bugs, and share frontend development insights.

![Xのプロフィールで[Videos]タブの下にドロップダウンメニューが表示されている画像](/_next/image/?url=%2Fapi%2Fmedia%2Ffile%2Fx-lite-videos-tab-dropdown-thumbnail.png&w=3840&q=75)


![An image showing a drawer titled [Scheduled post] with a calendar on X’s post screen](/_next/image/?url=%2Fapi%2Fmedia%2Ffile%2Fx-ios-scheduled-post-thumbnail.png&w=3840&q=75)